How to do a temperature tower in Cura

Trevor Haas
TL;DR
- Use a temperature tower to find the optimal print temperature in Cura.
- Select a model with multiple levels.
- Use the "Change-at-Z" plugin to adjust temperatures at different heights.
- Examine the results for stringing, surface quality, and other issues.
- Adjust settings if needed for fine-tuning.
AI 3D Printing Calibration
Upload a .3mf file and use AI to generate optimal print settings and optimize 5 print quality features at the same time
Temperature towers are a great way to test different temperatures quickly in a single print. It works by stacking repeated sections of a print, and changing the temperature in each of these sections. Temperature towers are a specific type of calibration tower, which can be used to test a number of different settings or combination of settings.
Why might you want to do a temperature tower? Temperature can effect a host of print characteristics, including:
- Stringing
- Surface Quality and/or surface finish
- Bridging performance
- Strength
- Extrusion quality
This guide will specifically show you how to do a temperature tower in Cura.
Below is a step-by-step guide to do an effective temperature tower, what to look for, and what to do when you have found a good temperature (or, what to do if your results are still sub-par)
- Choose a temperature tower model
- Use the Post-Processing change-at-z plugin
- Select your temperatures at the right height
- Print the part
- Interpret the results
- Print again, if applicable
- What to do if you’re still having problems
1. Choose a temperature tower model & load into Cura
First, you must choose a temperature tower to print. You have two choices here:
- Download an existing temperature tower (recommended)
- Design your own temperature tower
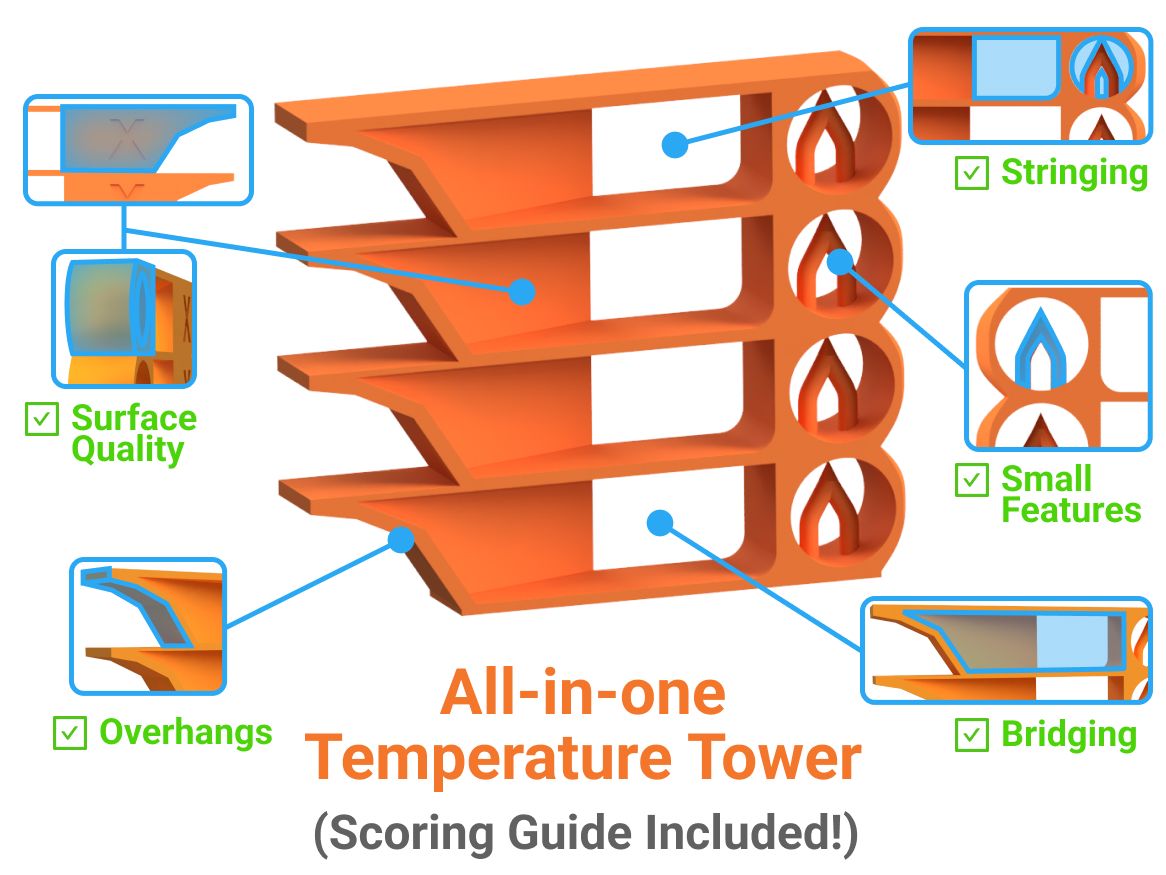
For this article, we used our specialized calibration model. We’ve worked extra hard to optimize a model that prints with less than 1 gram of material and between 6 and 7 minutes for each level.
You can download the single-level STL file from our Thangs or Printables profile. Each level is 8 mm tall (you’ll need this information next).

Note: Our model works best with the following settings (these come pre-configured in a 3mf file as part of inTinker’s calibration workflow). These settings will enable you to reach our print time and weight benchmarks:
| Cura Setting Name | Value | Importance |
|---|---|---|
| Wall Line Count | 2 | High |
| Top Layers | 0 | High |
| Bottom Layers | 0 | High |
| Infill Density | 0% | High |
| Layer Height* | 0.2 mm | Medium |
| Nozzle Size* | 0.4 mm | Medium |
*Layer height only matters for print speed; if you plan to print your real parts with a different layer height, we recommend using that layer height.
**Our part was designed for a 0.4 mm nozzle, but our model still works great for nozzle sizes between 0.2 mm and 0.6 mm.
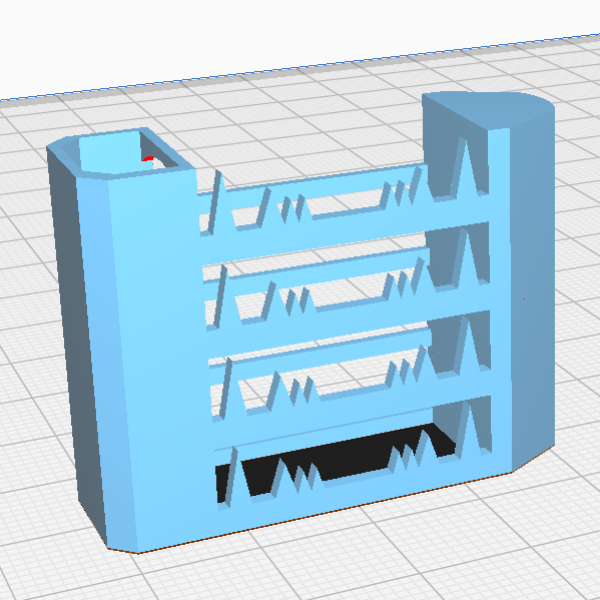
Download the STL file, load it into Cura. In this article, we’ve chosen to use 5 levels, so we made 4 additional copies of the model and stacked them on top of each other (hint: type in the coordinates for the same XY position, and increment 8mm for the Z-axis position of each new level)
If you are following along, you should see something like this in Cura:

2. Use the Post-Processing change-at-z plugin
If you don’t already have the post-processing plug for Cura, you’ll need it. Here is a link for direction on how to download the plugin.
Open the menu called Modify G-Code and add a script called ChangeAtZ. This is an awesome tool for changing settings dynamically during a print after at a certain height or number of layers.

Then you should see a menu that looks like this:

There are many interesting settings like speed, flow rate, fan speed, and retractions that you can play with (or use to your advantage), but in this article we’ll focus on the most valuable setting: Print Temperature.
3. Select your temperatures for each height
Some temperature tower models are embossed with the temperature on the surface—you are welcome to choose those same settings, but if you take good notes you can still choose any temperature.
Our calibration model (see step 2) doesn’t have any labels, so we are just counting from the bottom, starting with level 1.
This is what we printed:
| Level | Height (mm) | Print Temperature (°C) |
|---|---|---|
| 1 | 0 | 200 |
| 2 | 8 | 205 |
| 3 | 16 | 210 |
| 4 | 24 | 215 |
| 5 | 32 | 220 |
For each of these levels, you’ll need to add a unique ChangeAtZ item.
First, make sure the trigger is “Height,” applied to “Target Layer + Subsequent Layers.” Then change the height to the correct value.
Next, toggle the “Change Extruder 1 Temp”

4. Print the part
After everything is set up, you are ready to slice and print the part! You should see this red icon with the number of ChangeAtZ scripts. If you have 5 levels like we did, you should see a 5 in this red icon.

Sliced result:

Learning to look at & interpret the toolpath of a 3D print is an extremely valuable skill. The blue lines show the travel moves, which is where stringing is possible to occur. If you ever notice surface quality defects—looking at the sliced toolpath will give insight to the problem.
5. Interpret the results
You want to look for the level that shows the least amount of stringing or surface quality defects. At inTinker we’ve done hundreds of experiments to learn from first principles how this works, so we can offer you the best solution.
Sometimes you’ll get lucky and have many levels that look good. This is totally possible! We recommend leaning towards higher temperatures because it usually makes your models stronger.
If you’re not satisfied yet, move on to the next step.
6. Print again, if applicable
If you want to keep dialing in further, you can refine your temperature range and look in increments of 1 to 3°C. With this strategy, you’ll be able to really dial in temperature.
You may also want to dial in retraction distance or retraction speed too. These can be set globally, or you can also use the ChangeAtZ tool for retractions.
InTinker's combined temperature & retraction calibration searches for temperatures in increments of 1°C while also tuning retraction distance and retraction speed at the same time. By using machine learning, we are able to effectively tune these settings simultaneously. If you’re interested in learning more, check out our AI Calibration page to learn more.
Related Articles
Learn more about inTinker

3mf Print Profiles
Save a Prusa Slicer 3mf file and upload it to inTinker to use those exact settings and presets in every calibation.

AI Calibration Pipeline
Calibrate all major features including Stringing, Surface Quality, Small Features, Bridging and overhangs all in the same print, all at the same time with AI.


