
Machine Learning meets slicer settings
A 3D printer calibration engine rooted in a robust machine learning algorithm designed push the limits of desktop 3D printers.
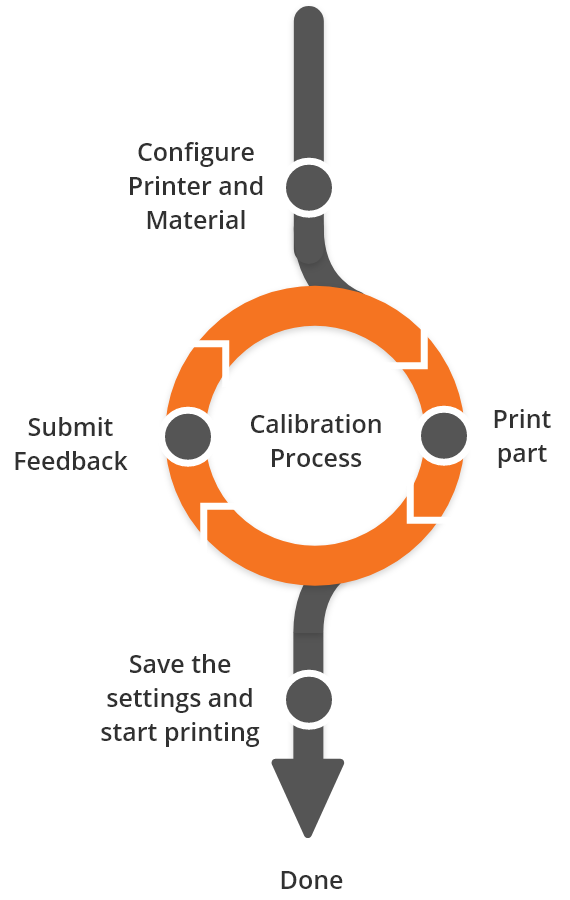
Universal Calibration Process for 3D Printing

Configure Printer and Material
Add your printer and material from our database, or create a custom printer or material
Print part
Download the .3mf file and open in Cura, click slice, then start the print. All settings and geometries are pre configured for each print. Each print is only 30 minutes long, requiring 3g of filament, and tests 4 sets of settings temperature-tower style.
Submit Feedback
Use our calibration scale to score the results of your calibration. After a few iterations, we'll dial-in on the best settings. This works by intelligently suggesting new and potentially better settings to try.
Done
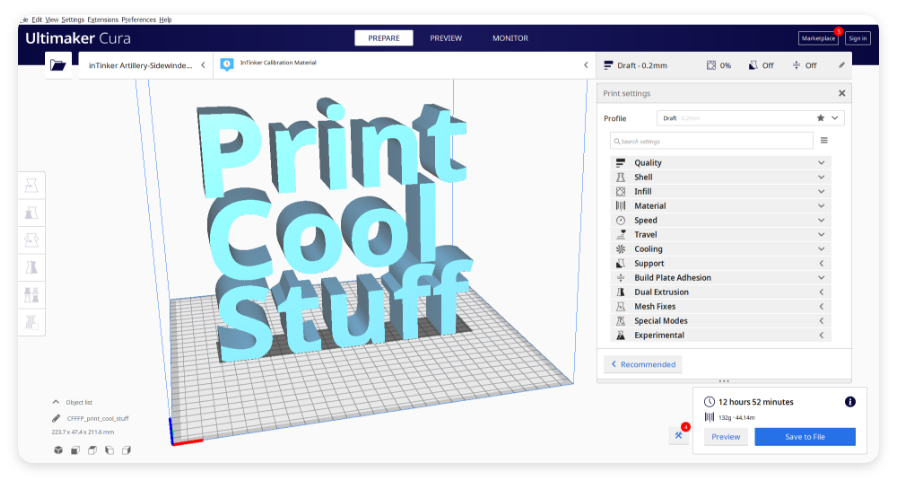
Download the new slicer profile to begin printing what ever you want

Auto Fill Slicer Settings
No need to manually load parts onto the build plate or manually type settings into the slicer. Download 1 file and open in Cura to load all parts and settings. Just press slice, and get right to printing.
Slicer Settings
The 3mf file comes automatically pre-loaded with the correct slicer and printer settings
Calibration Part
The 3mf file also includes the STL geometry of the part, in the correct orientation, ready to print, automatically
How it works
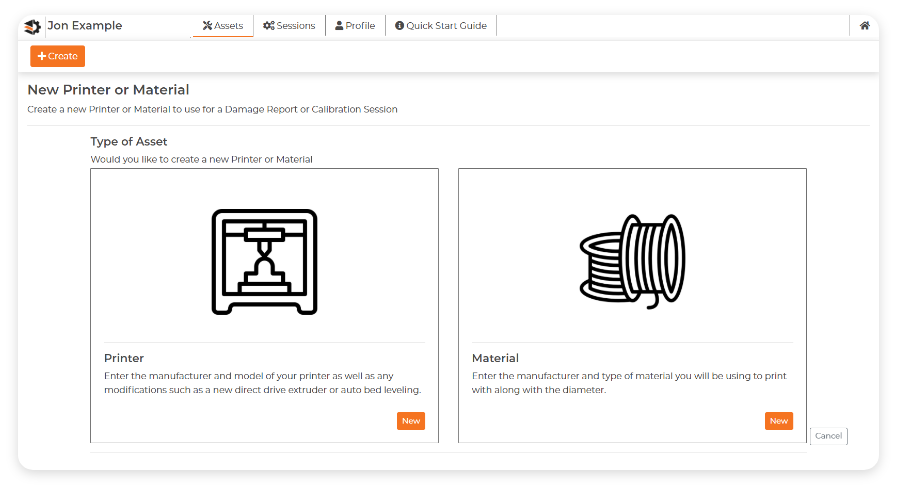
Add Assets
Before starting a calibration session, add or customize the printer(s) and materials(s) you would like to use. Keep in mind, we are trying to fully tailor the calibration to your specific setup.

Create a Session
Create a Calibration Session with a printer and material from your Assets. Download the .3mf file with all the settings, open in Cura, and start the print. Our part only takes about 30 minutes and 3 grams of material to print.
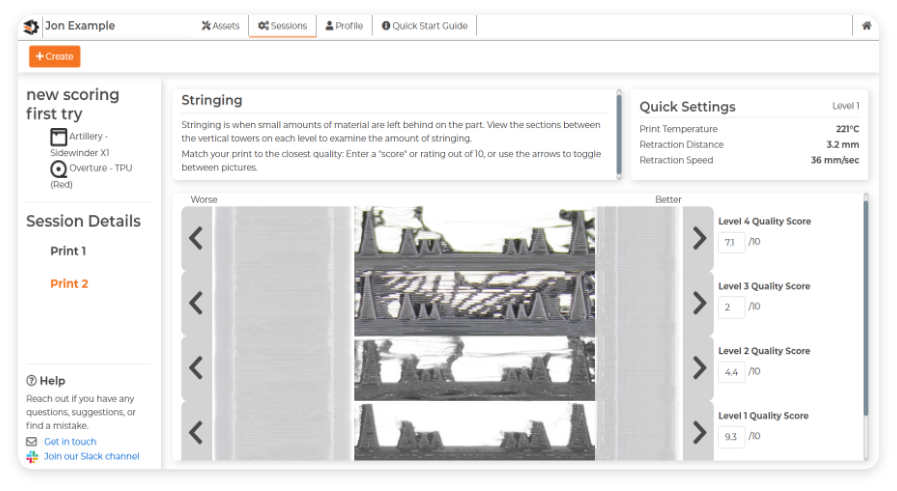
Score Print Quality
Use the arrows or type in a value in 0.1 increments to score each section of your part on a scale from 1 to 10. This allows the algorithm to understand the best and worst settings for your specific printer and material.
Save the Settings
After a few prints, the algorithm will have dialed-in the solution and provides you with optimal settings, like print temperature, retraction distance & speed, etc. Then you can get back to printing cool stuff!
Interactive Scoring
Using our innovative scoring system, we are able to capture feedback numerically to help fix your printer. Adjust the digital calibration scale to match the intensity of stringing and other defects in your printed part.
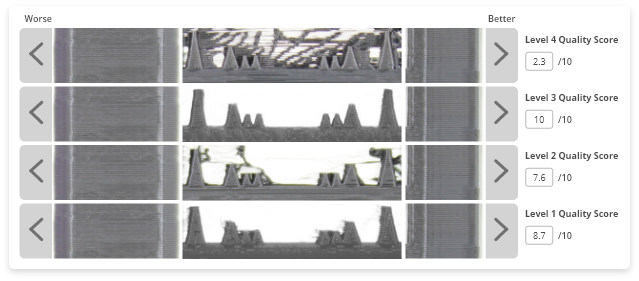
Stringing
Stringing is the primary focus of our first calibration module. You can see the varied quality in the adjacent picture of a representative 4-level part that's been scored.
Surface Quality
We'll also look at the surface quality, particularly under-extrusion. And we don't plan on stopping here.
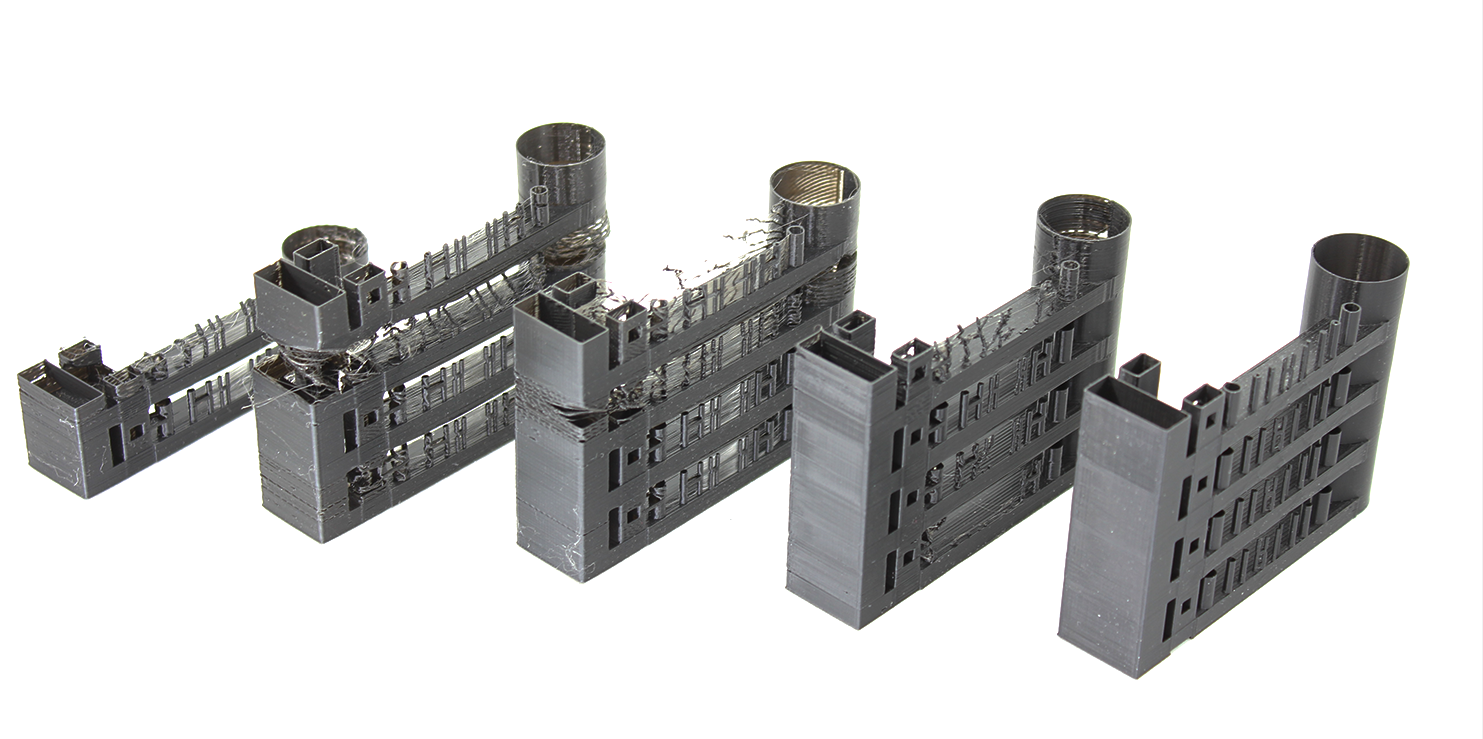
An Iterative Approach
As you print more calibration parts the algorithm learns more about your specific printer and material combination.
Give it a try!